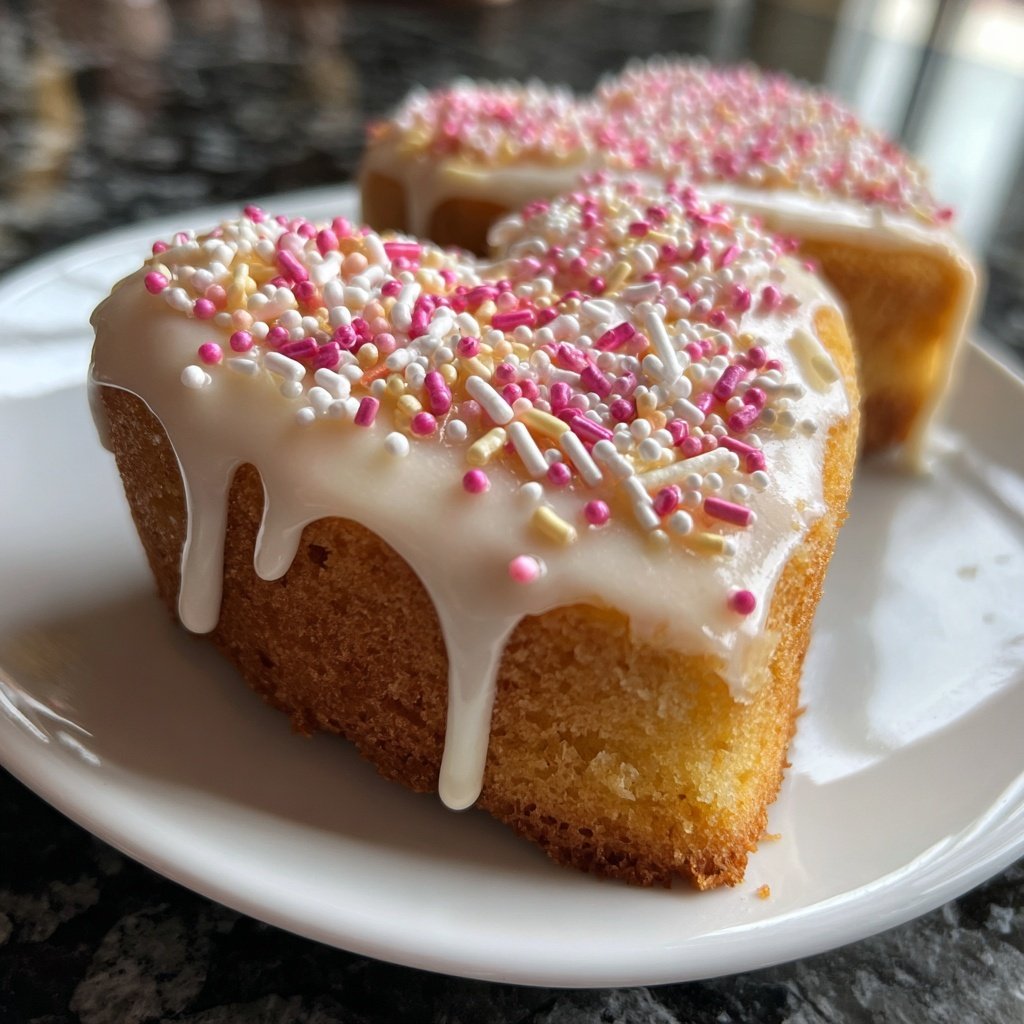
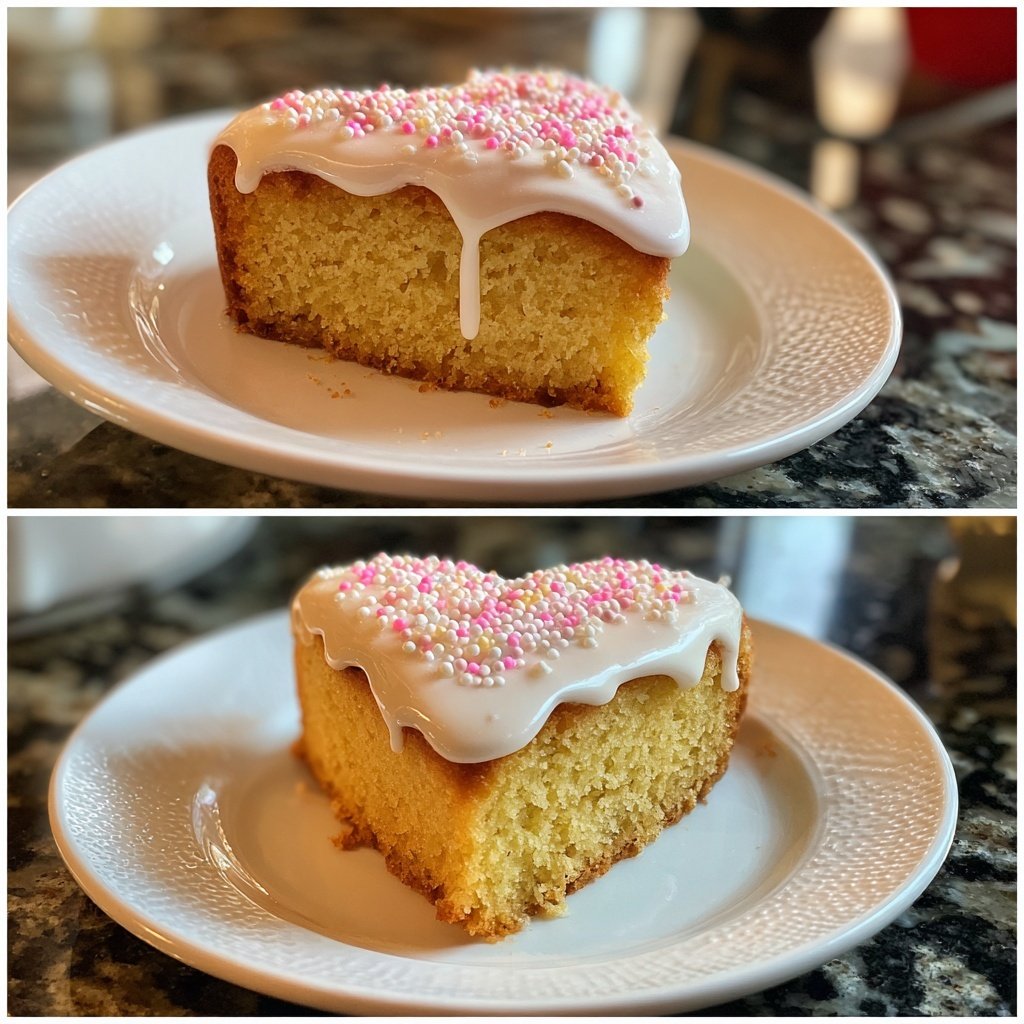
Mini Heart Cake with Vanilla Sponge
Highlighted under: Classic Ideas
I love baking, and there's something so delightful about making mini cakes that not only look cute but also taste amazing. This Mini Heart Cake with Vanilla Sponge has quickly become one of my favorites to whip up. The fluffy, light sponge pairs perfectly with a creamy frosting, and I adore how it can be a centerpiece for special occasions or just a sweet treat for family. Plus, it’s so easy to customize with different flavors or colors that everyone can have their own twist!
When I decided to create this Mini Heart Cake, I wanted to capture the essence of love and joy that comes with baking. I experimented with the vanilla sponge to achieve that perfect fluffiness. The trick I found was to whip the egg whites separately before folding them in, which results in a light and airy texture. My family couldn't get enough of them!
Decorating the cakes was just as fun. I went for a simple yet elegant approach, using a classic buttercream frosting tinted with pastel colors. Each mini cake didn't just look lovely; they tasted heavenly too. I can’t wait to see the smiles on everyone’s faces when they take the first bite!
Why You'll Love This Recipe
- Rich vanilla flavor that fills every bite
- Adorably mini, perfect for sharing and gifting
- Customizable for any occasion, from birthdays to anniversaries
Making the Perfect Sponge
The key to achieving a fluffy and light vanilla sponge lies in properly creaming the butter and sugar. This process should take about 3-5 minutes until the mixture is pale and fluffy, allowing the sugar to incorporate air into the butter. Make sure your butter is truly softened; if it's too cold, it will not blend well, leading to a denser cake. Room temperature eggs are also essential for a uniform mixture, so take them out of the fridge about 30 minutes before you start baking.
When combining the dry ingredients with the wet, do so in thirds, alternating with the milk. This method prevents overmixing, which can toughen the sponge. You want the batter to be just combined, so a few small lumps are perfectly acceptable. Always use a rubber spatula to gently fold in the ingredients so as to not deflate the batter.
Customizing Your Frosting
The buttercream frosting can easily be customized to enhance your Mini Heart Cake. Using unsalted butter is crucial as it allows you to control the sweetness of the frosting. If you're looking for a richer flavor, try adding a bit of cream cheese to the butter before mixing in the powdered sugar. This not only adds depth but also a slight tang that pairs well with the sweetness of the cake.
For a more stable frosting, especially if you live in a warmer climate, consider refrigerating your butter for about 10-15 minutes after mixing, before frosting the cakes. This will help it hold its shape better. Additionally, you can experiment with flavors by incorporating extracts like almond or lemon to the frosting for a unique twist.
Ingredients
Gather these simple ingredients before starting your baking adventure:
For the Vanilla Sponge
- 1 cup all-purpose flour
- 1/2 cup sugar
- 1/2 cup unsalted butter, softened
- 2 large eggs
- 1/4 cup milk
- 2 tsp vanilla extract
- 1 tsp baking powder
- 1/4 tsp salt
For the Buttercream Frosting
- 1 cup unsalted butter, softened
- 4 cups powdered sugar
- 2 tbsp milk
- 1 tsp vanilla extract
- Food coloring (optional)
Make sure you have everything measured out for the best results!
Instructions
Follow these steps to create your perfect Mini Heart Cakes:
Prepare the Cake Batter
In a mixing bowl, cream the softened butter and sugar until light and fluffy. Add the eggs one at a time, mixing well after each addition. Stir in the vanilla extract. In a separate bowl, combine flour, baking powder, and salt. Gradually add the dry ingredients to the wet mixture, alternating with milk until just combined.
Bake the Cakes
Preheat your oven to 350°F (175°C). Grease and flour your mini heart-shaped cake pans. Divide the batter evenly among the pans and bake for 20-25 minutes, or until a toothpick inserted into the center comes out clean. Allow to cool in the pans for 10 minutes before transferring to wire racks to cool completely.
Make the Buttercream Frosting
While the cakes cool, prepare the buttercream frosting. In a mixing bowl, beat the softened butter until creamy. Gradually add the powdered sugar, mixing well. Add milk and vanilla extract until you reach the desired consistency. If desired, divide the frosting into bowls and tint with food coloring.
Frost the Cakes
Once the cakes are completely cool, frost the tops as you like. You can use a knife or a piping bag for more decorative designs. Let your creativity shine, and feel free to add sprinkles or other decorations!
Serve and Enjoy!
Your Mini Heart Cakes are ready to be devoured! Serve them at your next celebration or enjoy them as a special homemade treat.
Enjoy the delightful experience of baking and sharing these adorable cakes!
Pro Tips
For added flavor, consider infusing the cake batter with lemon zest or almond extract. Also, be cautious not to overmix the batter to maintain a light texture.
Storage Tips
Storing your Mini Heart Cakes properly is essential for maintaining their moistness and flavor. If you have leftover cakes, they can be stored in an airtight container at room temperature for up to 2 days. For longer storage, wrap each cake tightly in plastic wrap and freeze. They can last in the freezer for up to 3 months. To serve, simply thaw at room temperature or pop them in the refrigerator for a couple of hours before frosting.
If you choose to frost your cakes ahead of time, keep them in the fridge. Frosting firmens up well when chilled, but allow the cakes to come to room temperature before serving to ensure optimal flavor and texture.
Serving Suggestions
These charming Mini Heart Cakes are an ideal dessert for a variety of occasions. For a romantic dinner, place them on individual plates with a drizzle of raspberry sauce or a dusting of powdered sugar for a touch of elegance. Pairing them with fresh strawberries or whipped cream adds a delightful contrast to the sweet sponge and frosting.
If you're looking to make these cakes even more festive, try placing them on a decorative cake stand adorned with flowers or lights for birthdays or anniversaries. Each mini cake can be personalized with different colored frostings or toppings, allowing guests to pick their favorite flavor combination.
Questions About Recipes
→ Can I make the cake gluten-free?
Yes! You can substitute regular flour with gluten-free all-purpose flour in this recipe.
→ How can I store the cakes?
Store the mini cakes in an airtight container at room temperature for up to three days, or refrigerate for a week.
→ Can I freeze these mini cakes?
Absolutely! You can freeze the un-frosted mini cakes for up to three months. Just wrap them tightly in plastic wrap.
→ What can I use instead of butter in the frosting?
You can use vegan butter or margarine as a substitute for butter in the buttercream frosting.
Mini Heart Cake with Vanilla Sponge
Created by: Unity Caldwell
Recipe Type: Classic Ideas
Skill Level: Intermediate
Final Quantity: 6 mini cakes
What You'll Need
For the Vanilla Sponge
- 1 cup all-purpose flour
- 1/2 cup sugar
- 1/2 cup unsalted butter, softened
- 2 large eggs
- 1/4 cup milk
- 2 tsp vanilla extract
- 1 tsp baking powder
- 1/4 tsp salt
For the Buttercream Frosting
- 1 cup unsalted butter, softened
- 4 cups powdered sugar
- 2 tbsp milk
- 1 tsp vanilla extract
- Food coloring (optional)
How-To Steps
In a mixing bowl, cream the softened butter and sugar until light and fluffy. Add the eggs one at a time, mixing well after each addition. Stir in the vanilla extract. In a separate bowl, combine flour, baking powder, and salt. Gradually add the dry ingredients to the wet mixture, alternating with milk until just combined.
Preheat your oven to 350°F (175°C). Grease and flour your mini heart-shaped cake pans. Divide the batter evenly among the pans and bake for 20-25 minutes, or until a toothpick inserted into the center comes out clean. Allow to cool in the pans for 10 minutes before transferring to wire racks to cool completely.
While the cakes cool, prepare the buttercream frosting. In a mixing bowl, beat the softened butter until creamy. Gradually add the powdered sugar, mixing well. Add milk and vanilla extract until you reach the desired consistency. If desired, divide the frosting into bowls and tint with food coloring.
Once the cakes are completely cool, frost the tops as you like. You can use a knife or a piping bag for more decorative designs. Let your creativity shine, and feel free to add sprinkles or other decorations!
Your Mini Heart Cakes are ready to be devoured! Serve them at your next celebration or enjoy them as a special homemade treat.
Extra Tips
For added flavor, consider infusing the cake batter with lemon zest or almond extract. Also, be cautious not to overmix the batter to maintain a light texture.
Nutritional Breakdown (Per Serving)
- Calories: 300 kcal
- Total Fat: 18g
- Saturated Fat: 10g
- Cholesterol: 50mg
- Sodium: 160mg
- Total Carbohydrates: 36g
- Dietary Fiber: 1g
- Sugars: 22g
- Protein: 3g